Distance Converter
What is the best camera setting for portraits photography? In other words, which settings are reliable for creating beautiful portraits?
I will cover all the information you need to know about camera setting for portraits in this article. I will discuss both flash and no-light portraits. And whether you’re a complete beginner or a seasoned one, you’re sure to gain something from these suggestions.
Let’s start with portrait photography with natural light:
The Coolest Camera Setting For Portraits
Using Natural Light
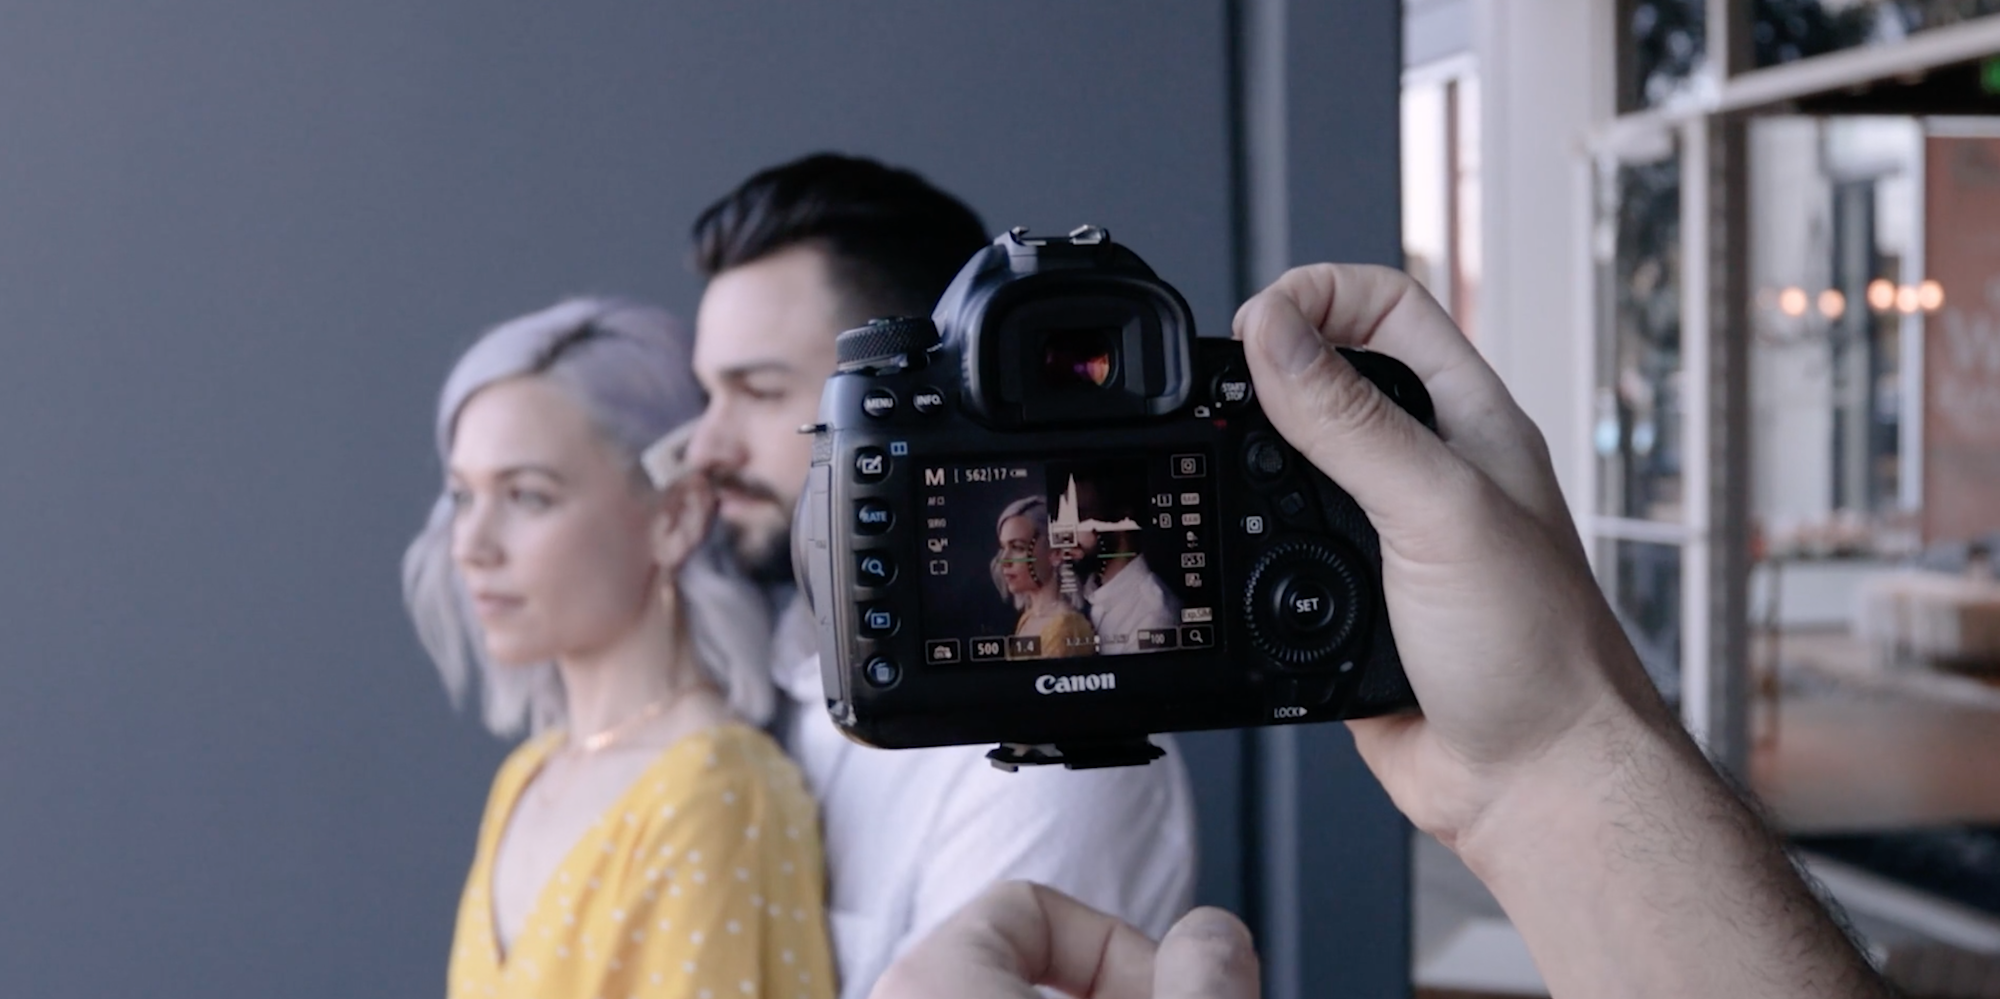
Although it’s not necessary, I do advise you to start the camera setting for portraits by switching your camera to Manual mode. In this way, you’ll have more creative control over your exposure. Sure, it could take a little longer to take your pictures while you play around with your settings, but you’ll get better results since you are a far better judge of how you want the finished picture to look than your camera.
Your ISO, shutter speed, and aperture are as follows:
ISO
The camera’s default setting for portrait photography with natural light is almost always ISO (ISO 100, ISO 160, and ISO 200 are three of the most common base values). This way, you can capture the highest quality images while avoiding excessive noise.
You may need to increase the ISO when shooting in low light, but use caution when doing so. Only increase the ISO after you have widened the aperture and decreased the shutter speed.
Aperture
I recommend choosing the ideal aperture when discussing camera setting for portraits. There is no one solution that works for everyone; Instead, you have to decide if you prefer a sharp or blurred background.
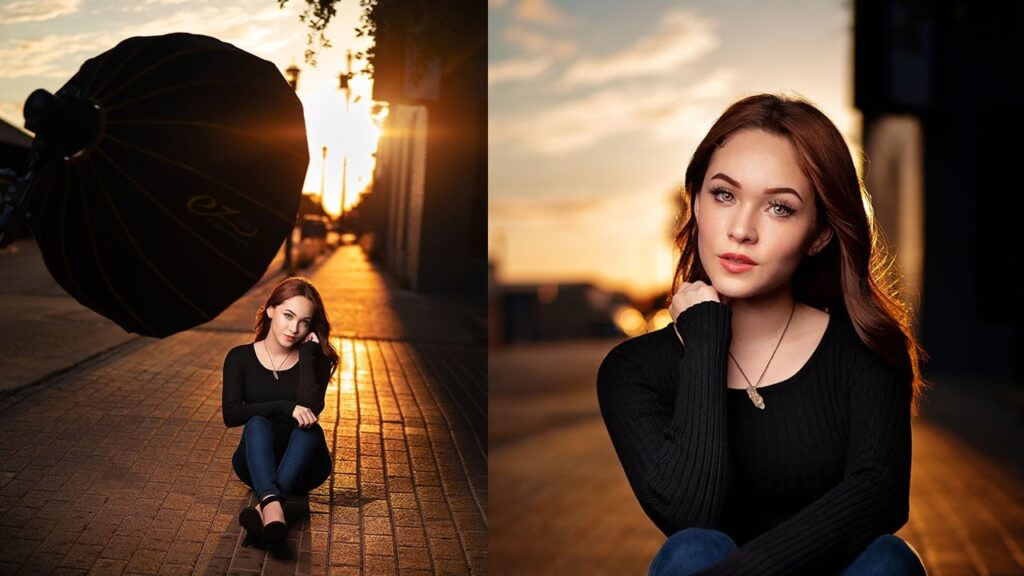
Use an aperture like f/1.4 if you want a blurred background. However, if you want the background to be more in focus (or if you want the sharpness of the image to be as high as possible), reduce two or three stops to f/4, f/5.6 or f/8.
Generally, portrait photographers want a blurred background (and all the images in this article use it too). Therefore, a wide aperture is the right choice if you like that aesthetic.
But be careful not to stray too far. Avoid using a depth of field that is so shallow that the subject’s nose is out of focus!
Shutter speed
At this point, you’ve chosen your aperture based on aesthetics and your ISO based on image quality concerns.
So what comes then? decide your shutter speed. What you should do is: Just check the meter in the camera and vary the shutter speed until you get a reading in the middle of a number that indicates a well-exposed scene. Next, take a test shot and check the camera’s histogram and LCD screen.
The histogram should be as far to the right as possible without over-brightening the highlights. Increase your shutter speed if highlights are overexposed. Increase the shutter speed if the photo is too dark.
After you reduce the exposure, think about the length of the shutter speed. And consider whether this speed is fast enough for accurate shooting. After all, if an image is blurry, even a properly exposed image is useless.
In general, you should set a shutter speed twice as fast as the focal length of the lens (or faster). For example, to avoid camera shake and blurry photos, you would choose a minimum shutter speed of 1/200 second when using a 100mm lens.
This rule does not always apply to camera settings for portraits. You can take photos with slower shutter speeds if you’re using a tripod, have in-camera stabilization, or are using a lens with built-in stabilization. If not, however, make sure your shutter speed adheres to this “double focal length” rule (and always take a test shot or two, then zoom in on your LCD to make sure you’re not using it). make sure everything is sharp).
By the way, if your shutter speed is too slow, you will need to increase the ISO or widen the aperture to compensate for the amount of light lost as you increase the shutter speed. You must choose the value you are willing to give up because either option may work.
Using Flash
Although the basic settings for portrait flash photography may seem complicated, they are really fairly straightforward.
Be aware that whether you’re utilizing a studio strobe setup, a small speedlight, or an on-camera flash, these principles are typically the same. Is that clear?
Additionally, for the purposes of this section of the post, I’m going to presume that you are illuminating your subject solely with studio light rather than a combination of studio light and ambient light.
ISO
For the best image quality, it is recommended to keep the ISO as low as possible when taking portraits in natural light.
Therefore, set the ISO to the camera’s default setting and leave it at that. If you need to increase exposure but don’t want to change aperture or light output, you can think about increasing the ISO, but in general, the ISO should stay the same.
Aperture
One of three factors that can be used to regulate the exposure of a flash portrait is the aperture (with ISO and flash power as the other two).
Technically, you can choose your aperture depending on the depth of field, but you should be cautious not to go too wide because the larger the aperture, the less flash power will be required for a proper exposure.
F/8 or so is a nice place to start, but feel free to change it to suit your aesthetic (or exposure) requirements.
Shutter speed
Shutter speed has little effect when taking pictures with flash.
Set your shutter speed to a flash sync speed, usually 1/200 second (if you set a shutter speed higher than this, your photo will have a dark band around the edge).
While you’re free to go slower than the sync speed, I generally recommend doing so on the camera setting for portraits for the duration of your photography.
Flicker Intensity

Flash output is another factor to consider about camera settings for portraits
Most of your time should be spent here, and you can use the variable wattage setting of the strobe to get the right exposure when photographing people.
Therefore, first choose the shutter speed, aperture, and ISO. Then adjust the strobe power until you achieve the desired result.
Conclusion
So, you now know just what settings to utilize for stunning portrait photographs. You’ll be shooting like a pro with a little practice.
So grab your camera and go outside. A fantastic time. Also, work on your exposures!
Now it’s your turn:
Do you have any recommendations for portrait photography settings? Share your thoughts in the following comment box.