Distance Converter
For photography enthusiasts, owning a film camera is always a dream. In addition to digital cameras, there are still equally popular mechanical cameras. This article How To Clean Film Camera Easily will help you know how to clean film cameras.
What is a film camera?
In contrast to digital cameras, which store images electronically on a memory card, film cameras use rolls of film to capture and store images. Film cameras have been around for over a century and were the primary method of photograph capture until the advent of digital photography.
A lens is typically used to focus light onto the film, which is then exposed to create a negative. Prints can then be made from the negative. SLR (single-lens reflex) and rangefinder cameras are two popular types of film cameras.
Why do we need to clean the camera film?
Cleaning camera film is necessary for several reasons:
During loading, shooting, and unloading, dust and debris can accumulate on the film, causing spots or scratches in the final image. This can be avoided by cleaning the film before and after use.
During processing, the film can become dirty or smudged, lowering the quality of the final image. Cleaning the film before processing helps to ensure that the image is as clear and sharp as possible.
Cleaning film can also aid in its preservation. The film can degrade over time due to dust, dirt, and other debris. Keeping the film clean can help it last longer and ensure that the images remain legible after many years. This is the next information in How To Clean Film Camera Easily.
How To Clean Film Camera
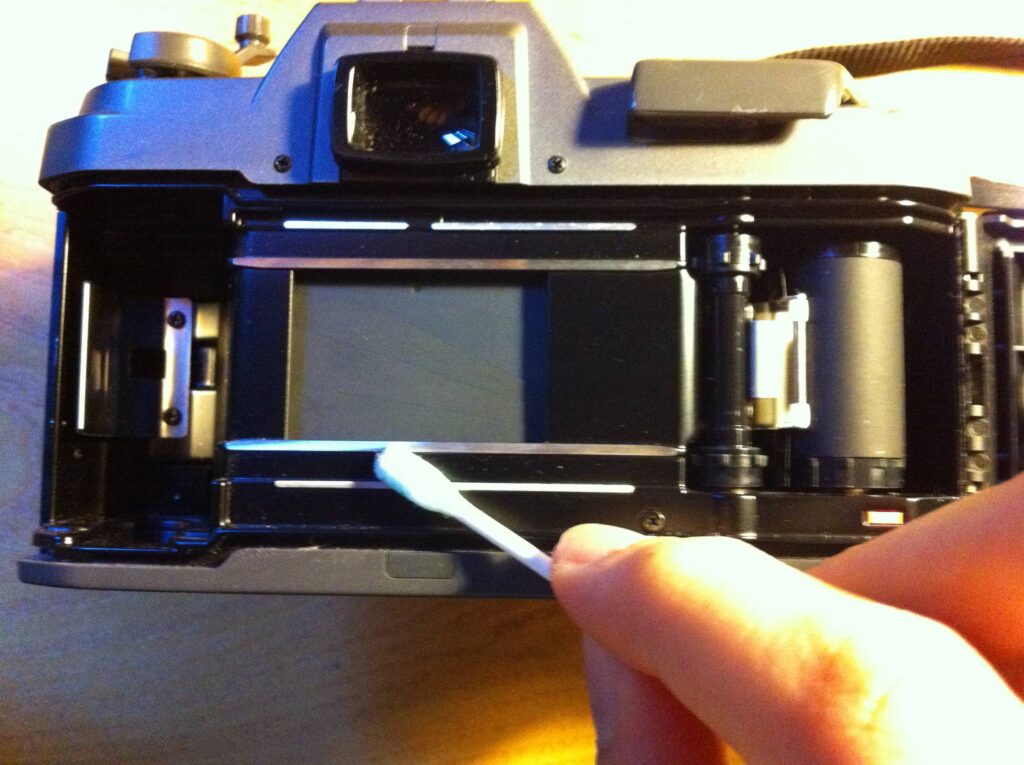
Remove and separate the parts in the film camera before cleaning
Removing and separating film camera parts before cleaning can help ensure that the camera is thoroughly cleaned and that each part is cleaned and maintained properly.
Before cleaning a film camera, the following steps should be taken:
To begin, remove the film from the camera and set it aside.
Open the camera’s back carefully or remove the film compartment, taking care not to damage any springs, gears, or other moving parts.

Remove the lens from the camera body with care, taking care not to damage any electrical connections.
Remove the viewfinder as well as any other removable components such as the film advance lever or rewind knob.
Remove dust and debris from the inside of the camera body, lens, and other parts with a soft brush or compressed air.
Use a cleaning solution and a microfiber cloth or a soft brush to clean each part separately.
Before reloading the film and closing the camera’s back, reassemble the camera, making sure that all parts are properly aligned and working properly.
When removing and separating the parts of a film camera, it’s critical to be careful and keep track of all the small parts so they don’t get lost or mixed up during cleaning. This is the next information in How To Clean Film Camera Easily.
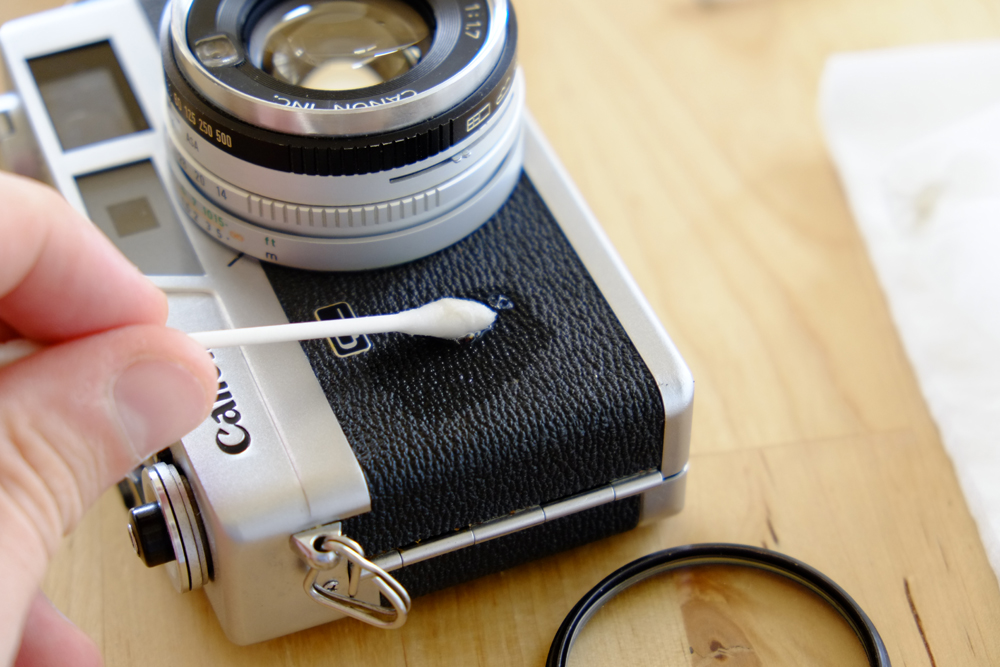
Cleaning the outside
Cleaning the outside of a film camera is essential for maintaining its appearance and ensuring proper operation. Here are some cleaning instructions for the outside of a film camera:
Remove any dust or debris from the camera’s exterior, including the lens, viewfinder, and film compartment, with a soft brush or compressed air.
Wipe down the exterior of the camera body with a microfiber cloth or a camera cleaning solution, being careful not to get any liquid inside the camera.
Use a lens cleaning solution and a microfiber cloth to clean the lens, being careful not to scratch the surface.
Clean the viewfinder with a microfiber cloth or a cleaning solution, taking care to remove any smudges or debris that may be obstructing the view.
Remove dust and debris from the film compartment, film advance lever, and other moving parts with a dry cloth or compressed air.
If the camera is made of leather or other materials, clean it with a gentle cleaner and a soft cloth, taking care not to damage the materials.
It is critical to be gentle and use only camera-safe cleaning materials and methods, as harsh chemicals or abrasive materials can damage the camera and impair its performance.
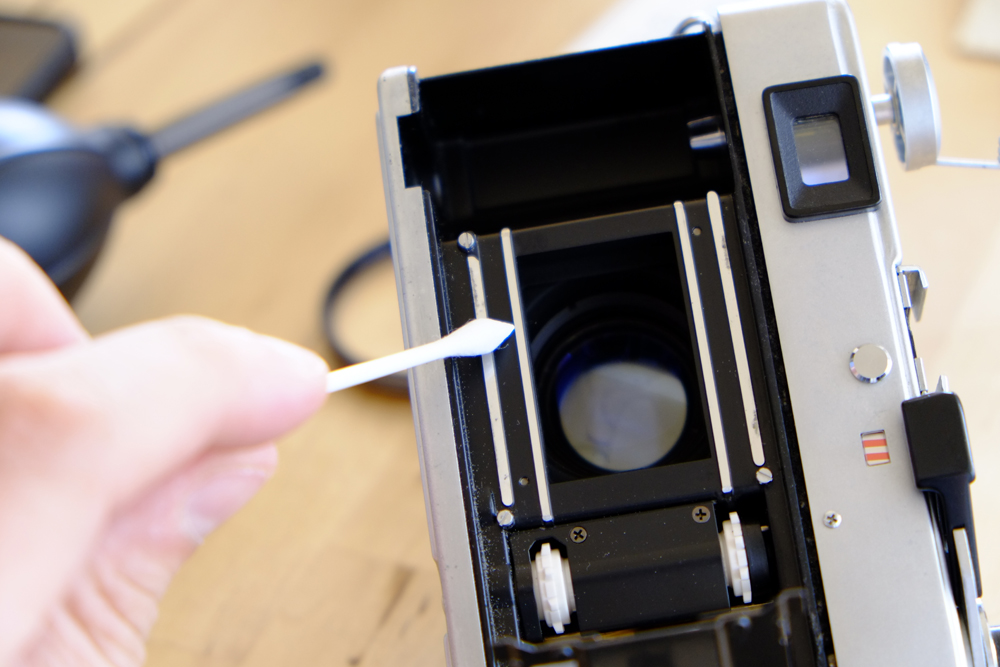
Cleaning the mirror and lens
Cleaning the mirror and lens of a film camera is essential for maintaining image quality and ensuring the camera’s proper operation. Here are some cleaning instructions for a film camera’s mirror and lens:
Begin by detaching the lens from the camera body. Remove the lens’s removable rear cap as well.
Clean the front and rear elements of the lens with a lens cleaning solution and a microfiber cloth, being careful not to scratch the surface. To clean the surface, use circular motions to remove any dirt or smudges.
Remove any dust or debris from the lens barrel and mount it with a brush or compressed air.
Remove dust and debris from the mirror and the area around it with a blower or brush if your camera has one. Do not use your fingers or a cleaning cloth to touch the mirror as this may scratch or damage the surface.
Replace the lens on the camera and reassemble it.
To avoid scratching or damaging the lens surface, use a cleaning solution specifically designed for lenses and be gentle when cleaning.
It’s also a good idea not to use any cleaning solution or cloth on the mirror because it could scratch the surface. This is the next information in How To Clean Film Camera Easily.
Clean the battery terminals and flash contacts
Cleaning the battery terminals and flash contacts of a film camera is necessary to ensure that the camera is operational and that the batteries and flash are providing adequate power. Here are some cleaning instructions for film camera battery terminals and flash contacts:
Begin by removing the camera’s batteries.
Remove any dust or debris from the battery compartment, including the terminals and flash contacts, with a soft brush or compressed air.
To clean the terminals and flash contacts, use a cleaning solution specifically designed for electronic contacts or a small amount of rubbing alcohol applied to a cotton swab.
Remove any remaining cleaning solution or debris with a dry cloth or a clean cotton swab.
Before re-inserting the batteries or attaching the flash, make sure the terminals and flash contacts are completely dry.
If the camera has an in-built flash, make sure to check the flash contacts as well. Clean them in the same way.
It’s critical to be gentle and only use cleaning materials and methods that are safe for use on electronic components, as harsh chemicals or abrasive materials can harm the camera and impair its performance. This is the next information in How To Clean Film Camera Easily.
Film camera lens care
Proper lens care is essential for maintaining image quality and ensuring that the lens of a film camera functions properly. Here are some tips for caring for a film camera lens:
When not in use, always use the lens cap to protect the lens.
Remove any dust, dirt, or smudges from the lens with a lens cleaning solution and a microfiber cloth, being careful not to scratch the surface.
Remove dust and debris from the lens barrel and mount it with a brush or compressed air.
Touching the lens with your fingers is not recommended because oils from your skin can leave smudges and potentially damage the lens coating.
Change lenses in a clean, dust-free environment to reduce the possibility of dust or debris getting inside the camera.
Long periods of exposure to extreme temperatures, humidity, or direct sunlight should be avoided.
To protect the lens from scratches and impacts, keep it in a dry and clean place, preferably in a padded case or bag.
When cleaning the lens, avoid using harsh chemicals or abrasive materials, as these can damage the lens coating and reduce the quality of the final images.
By taking these precautions, you can help protect the lens of your film camera and ensure that it continues to produce high-quality images for years to come.
Hopefully, the article How To Clean Film Camera Easily will provide useful information for you.