Distance Converter
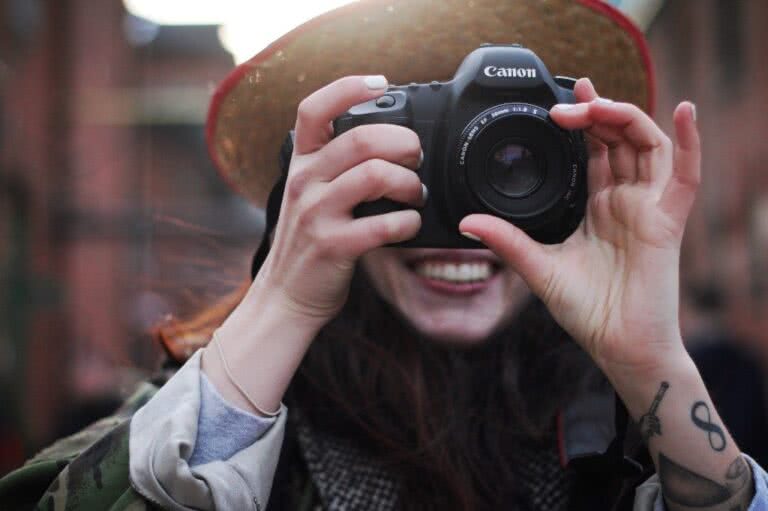
Nowadays, it is not difficult when you come across photographers everywhere, all the time, because the need to take pictures of people is increasing day by day. We can use everything from cameras to smartphones to satisfy our photography needs…Let’s Learn Basic Camera Skills will help you learn the basics of photography.
Basic photography techniques
A steady shooting posture, with the camera held in the proper position, will help you maintain your balance, prevent shaking, and produce images with the desired composition. Your thumb will be easy to manipulate, especially when holding the camera correctly, such as pressing the shooting menu or reviewing images…
Correct hand posture

Hold the camera firmly in your right hand, index finger on the shutter button. The camera body and lens are supported by the left hand. You can rest your left hand on a nearby table or sturdy object. To firmly stabilize the machine, place your elbow on the support table. To reduce vibration, the elbow rests on the upper abdomen. The brow rests on the rubber cushion of the viewfinder to prevent body shake and stabilize the image, especially when shooting at slow speeds.
Standing
The hind legs are slightly slack to stand firm and easy to move. Can lean against the wall to help the body steady, minimize machine shaking. Standing against the wall is especially effective when shooting with slow shutter speeds without a tripod. This is the follow-up in Let’s Learn Basic Camera Skills.
Sitting posture
Kneeling to take pictures is very common for photographers because there are so many different shooting angles. For example, if you want to extend the legs of the person being photographed or get a high, airy background, the sitting position is also very good. reasonable. When kneeling, your elbow rests on your knee, and your body serves as the solid body to stabilize the machine. for sharp and balanced images.
Basic camera parameters you need to know
What is lens aperture?
The lens aperture is a diaphragm in a camera lens that can be adjusted to control the amount of light that passes through to the camera sensor. It’s expressed as an f-number (for example, f/2.8 or f/4), which is the ratio of the aperture’s diameter to the lens’s focal length.
A lower f-number indicates a wider aperture, which allows more light to reach the sensor, whereas a higher f-number indicates a narrower aperture, which allows less light to reach the sensor. Adjusting the aperture, along with shutter speed and ISO, is one way to control the exposure of a photograph in photography.
In low-light situations, a wider aperture (lower f-number) is used to allow more light to reach the sensor and achieve proper exposure, whereas a narrower aperture (higher f-number) is used to increase the depth of field, making more of the image appear sharp and in focus.
What is ISO speed?
ISO speed is a digital photography setting that controls the sensitivity of the camera’s sensor to light. It is expressed numerically, such as 100, 200, 400, and so on. In low-light conditions, the higher the ISO value, the more sensitive the camera’s sensor is to light, allowing you to use a faster shutter speed or a smaller aperture.
As the ISO speed is increased, the camera amplifies the signal from the sensor, making the image brighter. However, as the signal is amplified, digital noise, or grain, is introduced into the image, making it appear less sharp and with lower image quality. As a result, it’s generally recommended to use the lowest ISO speed possible while still achieving a properly exposed image.
In most shooting modes, the camera’s auto-exposure system sets the ISO speed automatically, but it can also be adjusted manually by the photographer to suit their needs and creative vision. This is the follow-up in Let’s Learn Basic Camera Skills.
What is shutter speed?
Shutter speed is a camera setting that determines how long the shutter stays open, allowing light to reach the camera’s sensor. It is measured in seconds or fractions of seconds, for example, 1/1000 second, 1/60 second, 1 second, and so on.
Shutter speed has a significant impact on how a photograph looks and feels. A faster shutter speed, such as 1/1000 second, can freeze fast-moving action and eliminate motion blur, whereas a slower shutter speed, such as 1/15 second, can create a sense of motion by displaying the subject’s movement.
The shutter speed, along with the lens aperture and ISO speed, is one of the three primary ways to control the exposure of a photograph. In bright light, a fast shutter speed can be used to freeze motion, whereas a slow shutter speed can be used to capture motion in low-light conditions. Slow shutter speeds can also be used creatively to create motion or light trails in nighttime or low-light photography.
The shutter speed, like the lens aperture and ISO speed, can be set automatically by the camera’s auto-exposure system in most shooting modes or manually by the photographer to achieve their desired creative vision.
What is EV exposure and exposure compensation?
The exposure value (EV) of a camera is a numerical value that represents the amount of light that reaches the sensor. It is a method of standardizing the camera’s aperture, shutter speed, and ISO speed settings in order to control the exposure of a photograph. Each EV increment represents a doubling or halving of the amount of light reaching the sensor and corresponds to one stop of exposure.
Most cameras have an exposure compensation feature that allows the photographer to adjust the exposure of a photograph in relation to the camera’s automatic exposure setting. It is frequently represented as a scale of values in 1/3 or 1/2 stop increments of exposure, and it can be used to make the image brighter or darker.
To make an image brighter, for example, set the exposure compensation to a positive value, such as +1 EV, to add one stop of exposure. Similarly, to darken an image, set the exposure compensation to a negative value, such as -1 EV, to subtract one stop of exposure.
Exposure compensation is useful when the camera’s automatic exposure setting does not accurately reflect the desired exposure, such as when photographing a backlit subject or in difficult lighting conditions. It’s a quick and easy way to fine-tune a photo’s exposure and can aid in achieving the desired creative vision.
What is metering mode?
Metering mode is a camera setting that controls how the camera measures the amount of light in a scene in order to determine the proper exposure. The metering mode influences the exposure value (EV) calculated by the camera and is an important factor in achieving a properly exposed photograph.
The metering mode used is determined by the subject and the lighting conditions, and it is critical to understand the strengths and limitations of each mode in order to use it effectively. In most cases, evaluative metering is the best option, but center-weighted, spot, and partial metering can be useful in situations where a different metering mode is more appropriate.
Color temperature
Sometimes the captured image will have unnatural, unrealistic colors… this is because the machine perceives light incorrectly or is affected by color lights from outside. You can change the color palette from 1000 to 10,000 to get the desired color. This is the follow-up in Let’s Learn Basic Camera Skills.
Photography composition
There are numerous photo layouts available for creating extremely rich photo templates. Depending on each person’s perception, different images are produced. For those who are new to photography, a central and symmetrical composition is often chosen; this is a safe but monotonous, less artistic composition.
When you are familiar with the manipulation and have good skills, you will be able to create many different types of photo compositions, some of which have a very unique nature, deviating from the basic layouts that are the 13 rule; 23, guide lines, diagonals and triangles, patterns and surfaces, and so on. This is the follow-up in Let’s Learn Basic Camera Skills.
Conclusion
Thus, Let’s Learn Basic Camera Skills has shared with you basic photography techniques for beginners. Remember to master your camera and adjust the parameters and techniques to create the best photos!