Distance Converter
It’s time to discover what your camera is capable of and the settings you need to adjust for the best image quality if you’ve mastered the fundamentals of photography but are still not satisfied with your photo quality.
Every camera has a “sweet spot”. No brand, model, or specs, the camera will produce the best images with these settings. Here are some helpful suggestions to help you improve the quality of a photo.
The Best Tips To Improve The Quality Of A Photo
Use a Small Aperture
The size of the aperture of the lens, known as the aperture, determines the amount of light it lets in. F-stop is used to express this. Only a certain distance from the lens will be in focus with an f-stop of f/2.8 or f/3.5. The area in front and behind the focus will be blurred.
Use a lower aperture to focus more of the image and improve the quality of a photo; f/8 or f/11 can be a fair compromise. Use a higher number, such as f/14 or higher, to focus on as much of the scene as possible (great for landscapes). However, be careful not to “stop” as far as the lens allows.
At the end of the aperture, physical flaws can be seen due to the mechanical design of the lens. Diffraction becomes an issue at very narrow apertures, like f/22.
Lenses of all manufacturers and price points are affected by diffraction and loss of sharpness. Although more expensive lenses can provide sharper images at very small apertures, they still have the same problems as cheaper lenses.
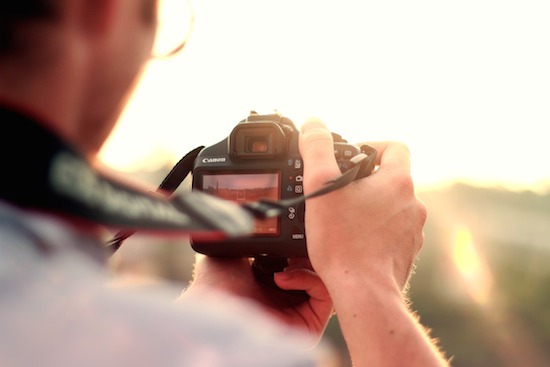
Perfect Your Focus
No one likes blurry pictures. To improve the quality of a photo the main priority is to get your subject in focus. The key to excellent focusing is practice and familiarity with your camera.
Most cameras have several focus options. A single focus mode is sufficient for static subjects. Use continuous focus mode to focus on what you point your camera at if your subject is moving, as long as you keep the button pressed.
In addition, to improve the quality of a photo has an autofocus mode that, when it detects motion, alternates between static and continuous focus. However, you should choose this mode yourself. See our detailed explanation of your camera’s focus modes and when to use them.
Select the area you want the camera to focus on. Do you want it to identify a certain location? When there are many subjects in a scene, focusing on the spot is very beneficial.
Also, familiarize yourself with the camera’s focus options. How good is your camera’s ability to focus in low light? If something strange enters the picture, does it turn bad?
Going out and taking pictures is the best way to improve the quality of a photo. Check out what happens under dim light. Your camera may have trouble focusing if the image is monochrome. In that case, find another subject close to your desired focus point with distinct contrast or edge and guide the camera to focus on that subject.
Your camera may have multiple settings to track the action when shooting fast-moving subjects such as animals, sports, or other fast-moving subjects. Check your camera’s manual to learn how each autofocus tracking option responds to motion. When someone enters the scene, some modes may choose to ignore them, while others will tune in and follow the newcomer.
For The Best Exposure, Use HDR Or Bracketing
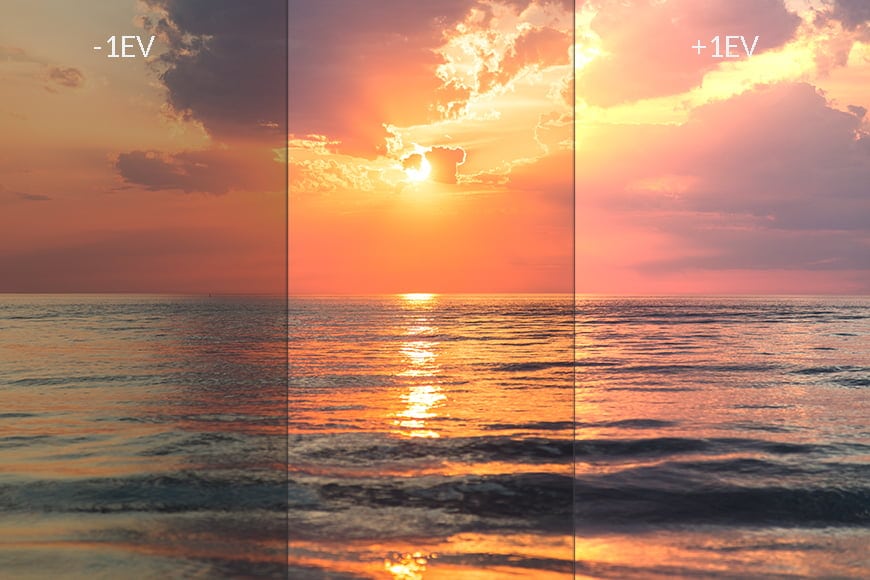
Some cameras offer HDR (High Dynamic Range). How much detail you can create in the darkest and brightest parts of a photo is called its dynamic range. Highlights will often be “blown away” and you won’t be able to recover details in the brightest places if you get good exposure in the dark and vice versa.
One camera will take three photos once you enable the HDR option. Three photos will be taken: one at the camera’s medium exposure setting, one at a darker exposure to show details in bright areas, and one at a lighter exposure
Three images are combined in the camera to create a clear image in all lighting conditions.
Another technique to improve the quality of a photo is bracketing, where you manually take several photos of the same scene with different exposure settings. These bracketed images may be incorporated in post-production. Results are comparable to when your camera uses auto HDR.
Use A Tripod And The Fastest Shutter Speed Possible
Slower shutter speeds make it difficult to keep your camera still, which can lead to blurry images. The shutter stays open for a longer time when the shutter speed is below 1/80 or 1/60 second, so you may need to move the camera. The blurring can happen because of your breathing or heart rate. Avoid making these mistakes when choosing a shutter speed.
If you want to use a slow shutter speed, mount your camera on a tripod. Check out small tripods like the Manfrotto Pixi, which fold up small enough to fit in your pocket, if you don’t like the cost or weight of a large tripod.
At the other end of the spectrum, if a subject is moving fast and your shutter speed is too slow, it can be blurred. If you are shooting a moving subject, use a faster shutter speed. For people walking or moving slowly, a shutter speed of 1/500 is appropriate. Try shooting at 1/3000 for diving birds and racing cars, but make sure the subject is well-lit.
If You Are Shooting JPEG, Increase The ISO
To improve the quality of a photo, make sure you get the right exposure because you can’t change the lighting in JPEG as much as you can in a RAW file. Raising your ISO may be necessary for this.
The sensor’s sensitivity to light is determined by ISO. However, when the ISO is raised, the image can become blurry and grainy. RAW files will also be affected by high ISO, although you have more freedom in editing dark RAW images when editing.
Knowing the highest ISO your camera will allow you to use is also helpful. Different ISOs produce different amounts of noise depending on the camera. Up to ISO 6400, the Canon 5D Mark IV performs well. Some Sony mirrorless cameras can effectively handle ISO 12,800. Find what works best for you by taking some test shots.
Take RAW Images
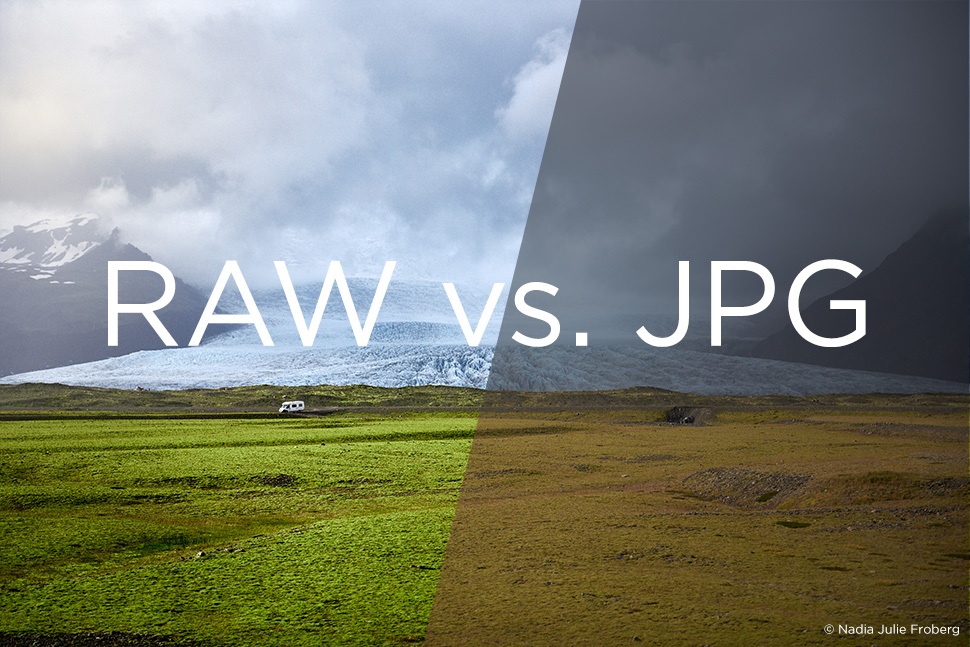
There are various photo quality settings on your camera. There are some settings that are JPEG, but there is also a RAW mode. Why is RAW so great, and what is it?
Using the sensor, the camera records an image, which is then saved as a file on a memory card. If set to JPEG, the camera chooses to edit the image, adjusting exposure, color saturation, and other factors. In addition, image information is compressed. Not all information is saved; it is similar to removing pixels.
On the other hand, images captured in RAW format are kept as digital files made up entirely of 1s and 0s. All details are available. The image will be displayed by a program that reads the file, such as Photoshop, Lightroom, or On1. You won’t notice unless you don’t have an app that can read RAW files.
Why does it matter if the RAW file has extra pixels? You’ll be amazed at how much you can change exposure, detail, color, and more when editing RAW files. After taking a photo, you can adjust the white balance using RAW files. If you take photos in JPEG format, you must be careful to set the white balance correctly. While it can be changed during the editing process, the RAW file can be changed more precisely.
Conclusion
With these tips show how simple it is to improve the quality of a photo. I sincerely hope that you have gleaned a lot of knowledge from this post.